Complicated substrates, irregular shapes and surfaces, greater versatility – these are only a few reasons why pad printing has been, and continues to be, a popular process across a variety of industries. However, while this process has been around for decades, it still poses issues for many printers seeking to utilize its benefits.
Plastics Decorating sat down with industry consultant and Pad Print Pros President John Kaverman to address some of the challenges regarding the pad printing process that he has encountered over the years. According to Kaverman: “While the theory of operation for every pad printing cycle is exactly the same – regardless of whether it’s three parts per minute or 300 being printed – the list of variables that create problems with the process is extensive. As a consultant, I address common misunderstandings of the impact on the process these variables have daily.” When asked about some of the most common issues found in pad printing, Kaverman noted three main issues and their potential cause.
Issue 1: The machine isn’t doctoring the clichés
There are several potential causes for this particular problem, including:

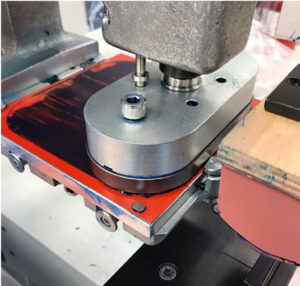
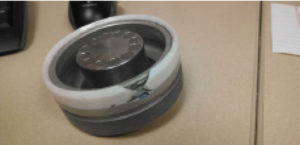
The doctor ring on the ink cup is worn. Most doctor rings are ceramic. When properly handled, they should last several hundred thousand cycles. It is when the sharp end of the doctor rings wear to a flat edge of 0.25mm (~ 0.010″) that they stop shearing and start smearing the ink. Replace the doctor ring.
Poor ink cup maintenance. In most cup designs, a flexible O-ring creates an interference fit between the ink cup body and the doctor ring. This feature allows the doctor ring to stay in intimate contact with the surface of the cliché as it traverses the cliché and changes direction during the cycle. When the cups are not properly cleaned and maintained, the doctor rings lose their ability to “float” or “flex,” and leaks occur.

Skimping on ink. Ink acts like a lubricant for the ink cup during doctoring. With most ink cup designs, there is a minimum amount of ink that will allow the cup to doctor the cliché efficiently.
When people have short run productions, they tend to skimp on ink – especially when using a two-component ink – because two-component ink must be discarded after the pot life has expired. The ink level within the ink cup needs to be enough to completely wet the cliché over the entire inside diameter of the ink cup on each cycle. Without sufficient wetting, the ink cup cannot clean the surface of the cliché sufficiently. To use an analogy, it’s like driving in a light mist, and the windshield wipers smear the windshield. Once it starts raining harder (more lubricant), they clean efficiently – unless they’re worn out or misaligned.

Scooping. Scooping sometimes happens with magnetic ink cups on thin photopolymer and laser engraved clichés. Depending on the cup design, the magnetic pull on the clichés can deflect the cliché, causing the doctor ring to “scoop” ink out of the image area where the magnets cause the highest degree of deflection. Sometimes, this can be alleviated or eliminated by using a spacer on the ink cup to increase the distance from the magnets to the cliché surface.
Issue 2: The ink isn’t sticking to the parts
The surface energy of the material is too low. For ink to adhere to a part, the surface energy (dyne level) needs to be 38 dyne/cm minimum. Forty-two or better is optimal. Polyolefins such as polypropylene and polyethylene are typically below the minimum and need to be pre-treated to raise the surface energy. Sometimes an adhesion modifier can be added to the ink, but it is only effective when the material has a borderline minimum surface energy.
Contamination is another culprit. Residual oils from upstream processes, mold-release or even oils and perspiration from human handlers can act as a barrier to efficient ink transfer and adhesion. Stay away from mold-release agents and avoid touching the image area of parts in handling.
Using the wrong ink and/or testing too soon. It is imperative to test inks and associated additives for adhesion, as well as chemical and mechanical resistance, long before production is initiated. No single pad printing ink sticks to everything or meets all performance requirements across the board. Printers should ask their suppliers for help with conducting test prints for evaluation.
Testing too soon is a common problem, especially when two-component inks are part of the equation. All inks are post-curing, meaning that while they might be dry, they have not cured to the point of having maximum adhesion and/or chemical and mechanical resistance.
Even UV-cured inks can post-cure for 24 hours or more after being applied. Two-component inks can range from 72 hours to five days or more, depending on the specific formulation. Follow the ink manufacturer’s drying and curing recommendations before performing quality control tests.
Issue 3: Print quality is poor

This can be a tough one to diagnose without photos of the defects and, preferably, video of the printing cycle and information about ink, additives, cliché specifications and pads. Some of the most common issues include:
Proper manipulation of solvent evaporation. The clever manipulation of solvent evaporation is what makes pad printing work. If the ink is too wet (has too much thinner or a thinner that evaporates too slowly), it won’t pick up and transfer efficiently. Depending on the machine’s capabilities, it might be possible to program short delays within the cycle to allow the ink more time to undergo the physical changes necessary to allow it to transfer completely.
If it’s not possible to program delays where necessary, speed up the evaporation of solvent by blowing low-pressure, low-volume air at the pad(s) between image pick-up and transfer. Blowing low-pressure, low-volume air at the part is also helpful when double printing or printing multiple color wet-on-wet within the cycle. If neither delays nor air are an option, try using a thinner that has a faster evaporation rate. When fast (45 ppm) or really fast (100+ ppm) cycles are required, air and fast thinner might be needed, along with a specific cliché etch depth.
Cliché is incorrect. A bad cliché can cause a multitude of issues. Etch depth and consistency are important. A typical straight etch is between 22 and 25 microns. If deeper than 28 microns, there will probably be issues with too much ink film thickness on the pad. If it is below 18 microns in depth, the ink might dry in the cliché before it is picked up or on the pad before it can be transferred (unless using a UV-curable ink).
If using a photopolymer cliché, the line screen might be wrong. Typical line screens are 150, 120, 100 and 80 lines/cm. 120 lines/cm are used about 90% of the time. If a little more ink film thickness is needed, use 100 line/cm. If there are finer details, use 150 line/cm for better resolution.
With laser engraved clichés, the angle with which the beam engraves and the frequency with which it removes material can cause issues. If the laser is fixed, the further it goes out from 90° vertical, the higher the potential for the laser to create sidewalls within the etch that are off vertical. This makes it difficult for the doctor ring to cleanly shear the ink at the edges of the image during doctoring and for the pad to pick up the image without the sidewalls of the etch interfering.
Incorrect or worn pad. When picking a pad, try starting with the pad that has the most mass, steepest angle and hardest material, then work down. More mass equals less distortion. The pad’s image area should be at least 20% larger than the image in all dimensions. Of course, if the machine cannot efficiently compress a pad, it is too large.
The higher the angle with which the pad compresses during transfer, the more efficient it is at displacing air from between the ink and the product. This is especially important when printing textured substrates and products having spherical, cylindrical and compound angled geometries.
Hard pads provide sharper image resolution (less distortion, better displacement of air), a more consistent ink film thickness and better penetration of textured surfaces than soft pads. Soft pads, having more oil, are more pliable and, therefore, last a little longer. So, try to save moving toward a softer pad as a last result when out of printing force to compress a harder pad with the same geometry.
The softer the pad, the more silicone oil it contains. There is no magic number for how long pads last. With each cycle, the pick-up and transfer of the ink depletes silicone oil from the pad. It is entirely possible for a pad with no visible wear (cuts, abrasions, etc.) to be worn out due to the depletion of silicone oils having reached the point where the surface energy of the pad is high enough that the ink won’t want to leave the cliché during pick-up or the pad during transfer.
When in doubt, change the pad (break it in first).

John Kaverman is president of Pad Print Pros, an independent consulting firm specializing in pad printing. Kaverman, who holds a degree in printing, has 32 years of experience in the plastics decorating industry in capacities including production, supervision, process engineering, technical training and sales. For more information, visit www.padprintpros.com.


